Showing posts with label Widgets. Show all posts

Monday, July 16, 2012

Amazing social sharing widget with effect

This widget is from Shareaholic, one of the leader in sharing scripts. They become famous for the success of the Sexy bookmarks. Now, I will share one of their creation, you can put them on blogger in these very easy steps.

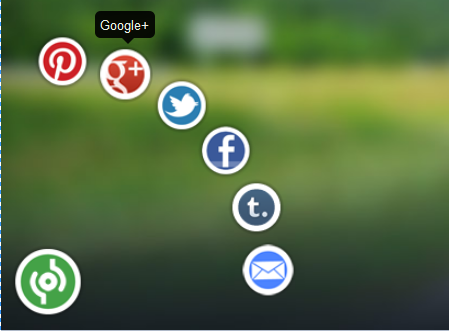
This is the sample picture, they usually stay on the lower left side of your blog, when someone highlights the green circle, a lists of social sharing sites will appear.

How to add this social sharing widgets to your blog?

1. Go to blogger>> dashboard>>
2. Back up your file in case you get an error.
3. Find these code </body> (use ctrl+F )
4. Copy the below codes and paste above the </body> code.
---------------------------------------------------------------------------------------------------
<!-- Start Social Sharing Widget Sassy Bookmarks HTML (howcarabao.blogspot.com)--> <div class="shr_ss shr_publisher"> </div> <!-- End Shareaholic Sassy Bookmarks HTML --> <!-- Start Shareaholic Sassy Bookmarks settings --> <script type="text/javascript"> var SHRSS_Settings = {"shr_ss":{"src":"//dtym7iokkjlif.cloudfront.net/media/downloads/sassybookmark","link":"","service":"5,7,2,313,38,201,88,74","apikey":"b87f5899d80a5edce8b5e55f58542ef0f","localize":true,"shortener":"bitly","shortener_key":"","designer_toolTips":true,"tip_bg_color":"black","tip_text_color":"white","viewport":true,"twitter_template":"${title} - ${short_link} via @Shareaholic"}}; </script> <!-- End Shareaholic Sassy Bookmarks settings --> <!-- Start Shareaholic Sassy Bookmarks script --> <script type="text/javascript"> (function() { var sb = document.createElement("script"); sb.type = "text/javascript";sb.async = true; sb.src = ("https:" == document.location.protocol ? "https://dtym7iokkjlif.cloudfront.net" : "http://cdn.shareaholic.com") + "/media/js/jquery.shareaholic-publishers-ss.min.js"; var s = document.getElementsByTagName("script")[0]; s.parentNode.insertBefore(sb, s); })(); </script> <!-- End Shareaholic Sassy Bookmarks script -->

Enjoy!


Friday, July 13, 2012

How to remove attribution widget

Are you annoyed that sometimes the attribution gadget gets in the way of your blog design?


Attribution is the one that says "powered by Blogger

This gadget is usually locked in most blogger templates, and I will teach you how to remove them on these simple steps.

1. Dashboard > Template >Edit html

2. Search using Control+ F >

     Look for this code

 <b:widget id='Attribution1' locked='true' title='' type='Attribution'>
  
    Replace true with false.

3. Now save the template.

Go to layout and look for the attribution gadget and then you can move it or remove it. 


Monday, December 19, 2011

How to add widget on Blogger Header

On blogger, you probably tried and experimented with the blogger gadgets or widgets, they are very easy to use and you can drag them anywhere you want. Usually beginners rely more on adding gadgets on their blog rather than editing the html, so it might not confuse them designing their blog.

But there are lay out parts of blogger that you cannot add a gadget, like the Header bar. Most of us wanted to add more gadgets on the header bar so it can save some space, put advertisement or put your own banner as you like.
I searched the web and found some techniques but it requires html knowledge. For beginners you are kinda worried about editing your html for reasons of messing up you entire blog.

So I found this simple instruction.

Step 1. Click "layout" or "design" on the old blogger interface----> "edit html"
Step 2. Look for this code (hint: use control F).

              <div id="header-wrapper">

Step 3. You can find that tag in this section

<div id="header-wrapper">   <----- the tag we are looking for
<b:section class="header" id="header" maxwidgets="1"showaddelement="no">
<b:widget id="Header1" locked="true" title="Sample Blog (Header)" type="Header">
</b:widget>
</b:section></div>

Now the instruction is to change the tag number in blue color to how many gadgets you will add. 
Dont erase the " " tag, just enclose the number within the " ". On the red colored tag, just replace the "no" to "yes" tag.

<div id="header-wrapper">
<b:section class="header" id="header" maxwidgets="3"showaddelement="no">
<b:widget id="Header1" locked="true" title="Sample Blog (Header)" type="Header">
</b:widget>
</b:section></div>

Click save, and you will notice an extra gadget slot is added on the header. You can put as much as 5 gadgets